

A Lovely Mani for Monday
February is here! Only 11 days till V-Day! I know a lot of people are not a fan of the day of love, which I totally understand, but I can’t help myself! Even if I didn’t have a reason to celebrate I would still love all the fun themes that go along with Valentines Day.
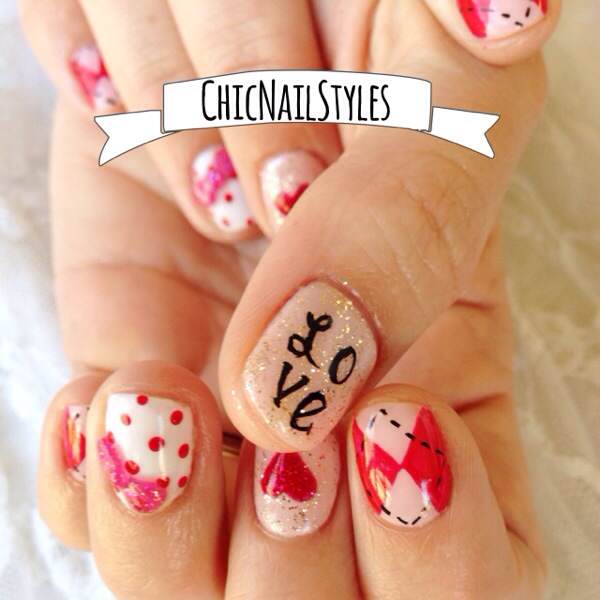
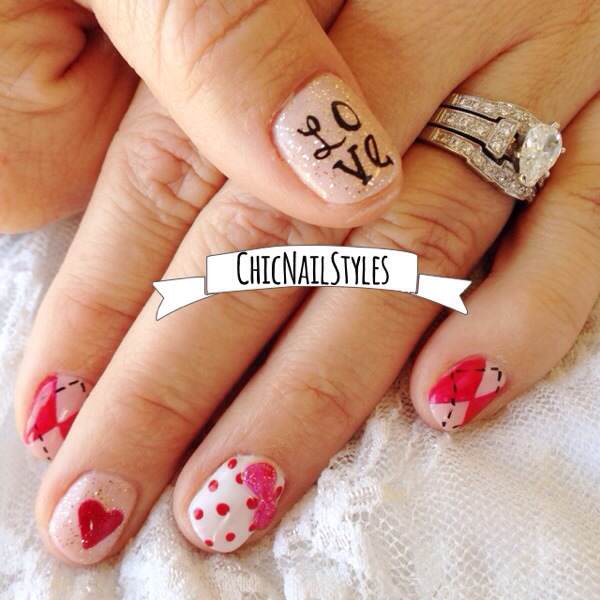
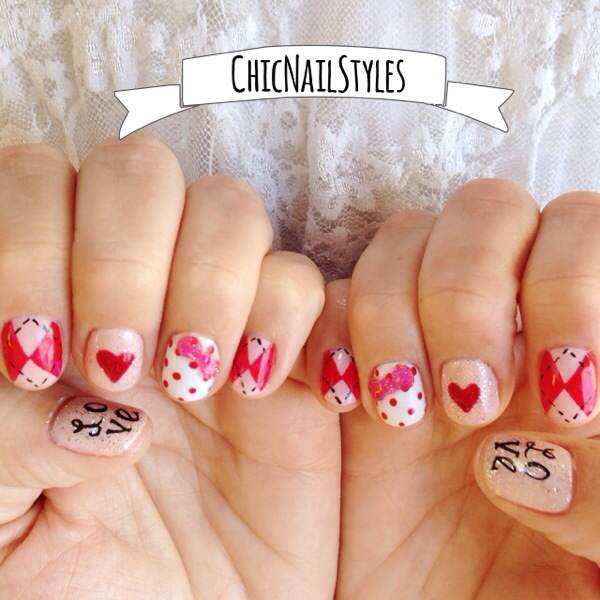
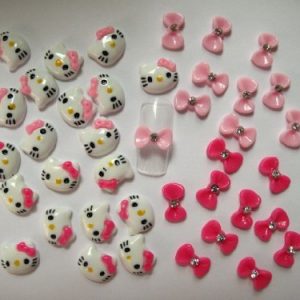
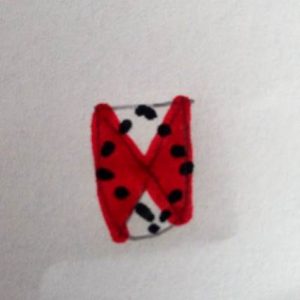
I did these nails for my beautiful friend Nicole. She told me I could have free reign. Well, anything but flowers is what she said. 🙂 I’ve been wanting to do an argyle pattern for a while now and experiment with some acrylic 3D bows as well because I ordered some new brushes off my store. I LOVE how these turned out! The only thing I would change is the color of the bow–a pretty soft pink pastel shade would have been cuter possibly, but the splash of hot pink adds flair and pizazz so I’m not complaining. 🙂
I’ll list all the products I used for these nails, but first let’s take a look at the finished product!

I hand painted everything…no stamping or stickers this time!
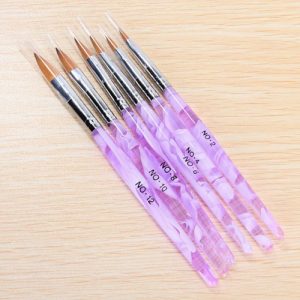
The key to writing on nails is a very fine, small art brush…
I am so in love with these!
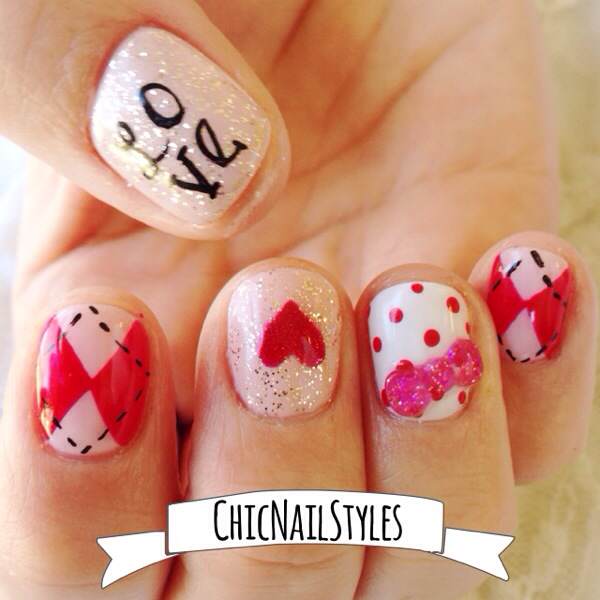
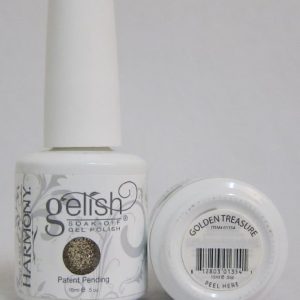
Gelish Hot Rod Red, Golden Treasure, and Pink Smoothie and OPI Alpine Snow are the colors used.
Products I Used
Instructions
I included the acrylic brushes I use to form the 3D bows just in case you are familiar with working with acrylic and have the supplies. I also added some really cute bows from my store that you could just glue on if you don’t know how to do acrylic artwork. The acrylic paint I listed is the paint I like the best for nailart. You just need a tiny, tiny, tiny amount. I used the black for the writing on the thumb and the dashed lines on the argyle. Here is how I do the argyle, polka dots, heart, and letters:
1. For the argyle, draw two triangles on your nail like this:
Find the center of the nail and have the two triangles meet in the middle there…
2. Next draw a dash line diamond pattern starting at the top, going out to each corner, and then ending down at the bottom of the nail. Use the black acrylic paint and a very fine art brush. Use very light strokes.
Argyle is just a pattern of triangles and diamonds…
3. For the polka dots, divide your nail in half and do a string of dots, starting at the center and working your way out to each edge, like this:
The big middle dot is just to show you where I start…center each dot out to the edges from the center dot
4. Next, add dots on each side of the first line of dots until you get to the edge of the nail:
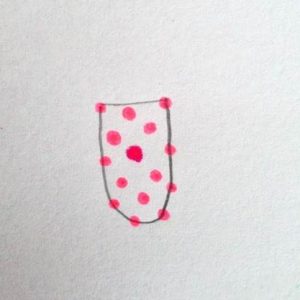
Doing polka dots is just like doing stripes but in a dotted line instead of a solid line…
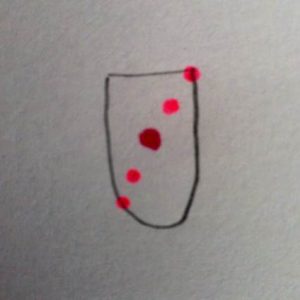
5. Use a dotter for the heart and add two dots…

place the hearts in the middle of the nail…
6. And then use a fine art brush to fill in the heart down to the point…

You will need to fill in the heart to however thick or thin you want it…
7. For the letters use the black acrylic paint and the very fine art brush. I actually clip more strands off my brush to get it even thinner. Use very light, small, even strokes. Make sure not to get a lot of paint on your brush. Steady your hand with your pinkie on your other hand. Breathe deep! 🙂
I wish I would have recorded myself doing these nails because it gives you a much better perspective! Darn it!
That pretty much wraps it up! I know it’s easier said than done but I promise anyone can do this look! And it can be done with regular polish just make sure your first color coats are super dry before you start the artwork.
Make sure to enter my contest! It ends February 13 so you’ve still got a couple weeks. Click on the picture below for a complete list of rules:

Click here for rules!
Thank you from the bottom of my heart for reading! XOXO!
Tootles–Anna
You are my FAVORITE!!! I love reading all of your posts!!! They make me SO happy!!! Thanks for making me pretty!!!
That’s so weird cause your my favorite!! :))) xoxo!!!!